• MEET MICHELLE
    • AS SEEN IN
  • greenhouse
  • playhouse
  • BLOG
  • Shop My Style
  • GARDENING MUST HAVES
  • SEARCH
Menu

iron & twine

Street Address
City, State, Zip
Phone Number

Your Custom Text Here

iron & twine

  • ABOUT
    • MEET MICHELLE
    • AS SEEN IN
  • greenhouse
  • playhouse
  • BLOG
  • Shop My Style
  • GARDENING MUST HAVES
  • SEARCH

DIY Magnolia Wreath

October 13, 2015 Michelle Cannon Smith
DIY Magnolia Wreath

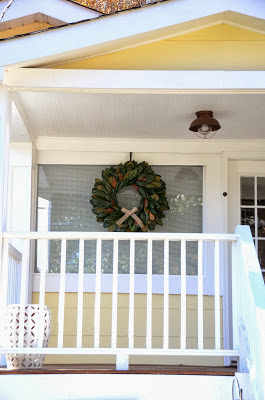
This time of year I love love love making Magnolia Wreaths.  When we purchased this home, we also inherited a huge, old, Magnolia Tree in the front yard.  I've always been a fan of these festive holiday wreaths, but the ones made with real greenery can cost a pretty penny.  So after experimenting a bit, I've figured out the best way for us to DIY our own!  And every year since, we've displayed one of these on our front porch.  Case in point, here's the first Magnolia Wreath I made 3 years ago:

 These are super simple to make, a bit time consuming, but considering they only cost the amount of a wreath form, it's well worth an afternoon!  I prefer using Styrofoam Wreath Forms, they're typically only one use, but I like not having to use floral wire.  Quick Note:  Be sure to display this wreath either indoors or hidden from the elements outside.  Heavy rains or wind can blow the leaves out of the styrofoam, I've displayed mine under a covered porch and have had no problems with this wreath staying in tact.  For this particular wreath I used a round 17 inch form ~ this makes a large wreath appox. 33-36 inches in diameter, depending on the size of leaves used.  I've made smaller ones using a 10 inch frame ~ this size works great indoors.

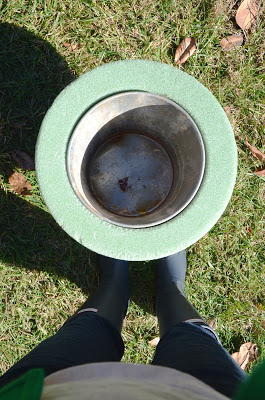
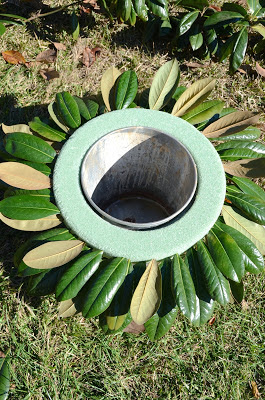
 Once you have your frame, find something to prop it up on.  A planter typically works great, in my case this Lowe's bucket was perfect size as the lip held my wreath up.

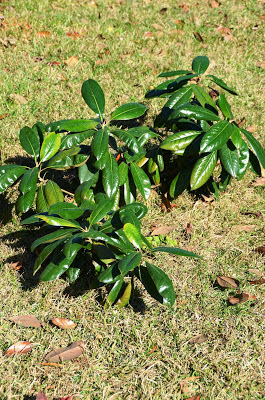
From there, you'll need your magnolia leaves.  We typically prune our Magnolia Tree a bit, so I use the leaves from the cut branches.  TIP: When cutting your leaves, cut at a diagonal, this creates a sharp point that easily pushes into the styrofoam.  

 Then I organize the leaves from largest (longest and widest) to smallest.  Staring with the largest leaves, begin inserting leaves individually at a slight angle.  Adding additional leaves clockwise around the form.  For my first tier, I start near the bottom, leaving space between each leaf: 

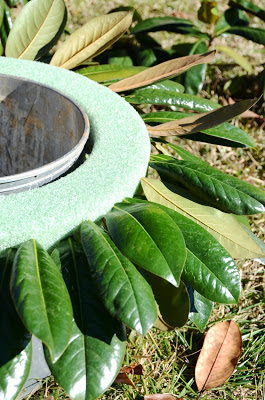
 Now that you're done with the first tier, move up a level and start the process again.  Moving clockwise, place leaves centered to the tier below and also start alternating some leaves backwards, showing the underside of the leaf (this will help create texture and color variation to your wreath): 

 Once your first two tiers are completed continue the process moving up the form while at the same time starting to use slightly smaller leaves. 

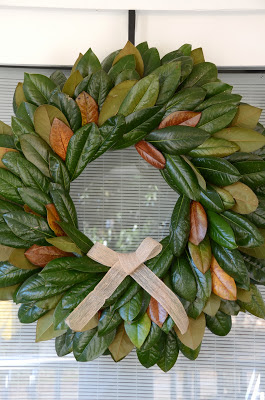
 Once you make your way to the front of the form, keep downsizing your leaf size and start inserting each tier at a slightly more defined angle. 

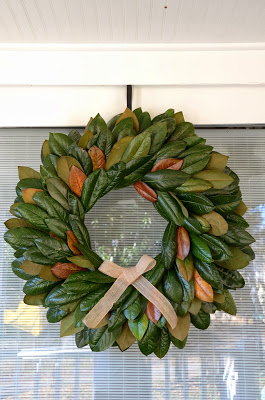
Before you know it, you'll have a completed wreath!

In diy, fall
4 Comments
← Newer Posts Older Posts →

michelle cannon smith

HELLO!

I’m so glad you’re here! After taking a blogging hiatus, we’re back and currently tackling one house project at a time, starting from the outside! With a new start & a fresh perspective, we’re living the simple life, at home and in the garden.

michelle cannon smith

Spring Fashion Uner $35 GIF.gif

spring fashion finds under $35

Bookshelf+styling+ideas.jpg

No Spend January & February
Under Sink Storage

MY FAVORITE UNDER SINK STORAGE


subscribe to iron and twine

INSTAGRAM


Did you catch today’s blog post?  Talked all things intermittent fasting!  Gave a recap for those new and inquiring and gave an update for those that have been kindly asking.  Again, do I think Intermittent Fasting is good for everyone?  Absolu
A bouquet for you and a bouquet for a friend 💐💐! One of the many reasons I grow garden roses and herbs together is that they make fragrant and pretty bouquets!  Now on the blog sharing my tips and favorite bouquet pairings👆🏻. Link in bio.
***
#da
No place I’d rather be 🥰. Today I’m in the children’s garden sharing how I’m turning a Rose shrub into a topiary and also showing you my simple trick to guarantee more basil!!! Stop by to say hello!  Always grateful for this
Cheerful Yellow Blooms to brighten your Monday 💛💛💛
***
#davidaustinroses #davidaustinroses🌹 #davidaustinrose #comtedechampagne #comtedechampagnerose #pottedherbs #containergarden #oregano #mint
Mother’s Day 2020 🥰  full hands, full heart ❤️ For all mamas out there, this is for you 👇🏻
***
Motherhood.  Mom, mother, madre, mama, mommy...a word that has no boundaries nor bloodline requirement.  A word for those that love unconditionall
Did you guys catch Rose Rehab today in stories?! Talked all about that dreaded Black Spot and shared what not to do when maintaining and caring for your rose shrubs 🤣😂. But seriously life, time and other things can so easily take precedent over the
michelle cannon smith


Subscribe

Get IRON & TWINE delivered directly to your inbox!

Like always we respect your privacy.

Thank you!  A confirmation email is headed to your inbox now!

COPYRIGHT © IRON & TWINE