How To Clean Wooden Spoons

 
Wooden Spoons
Maintaining utensils is essential for an efficient kitchen (try saying that three times fast!).  Here's a few simple tasks to extend the life of your wooden spoons.  
Lemon and salt on a regular basis helps sanitize and deodorize wooden surfaces and stains.  I simply cut lemon in half add salt and scrub directly on wooden spoons ~ then rinse in hot water.  We store our wooden spoons in a silver plate coffee pot on our windowsill ~ because of direct sunlight they tend to dry out quicker than normal.  To moisturize your wooden surfaces a little mineral oil will do the trick!


My Grandmother's Dictionary

thought'ful
1.  Characterized by or manifesting depth or richness of thought; full of thought.  
2.  Having thoughts (of); heedful; now esp., mindful of others; 
attentive to another's comfort; considerate.

I love vintage books, so it was a very welcome surprise when my mail carrier delivered this to my front door this afternoon! This was the dictionary my grandmother used through college, 1949-1952.  I recently began collecting old dictionaries ~ and I must say this one by far is my favorite!  So Grandma, thank you so much for sending this to me ~ the sentimental value is priceless ~ oh and it looks perfect sitting on my coffee table!
Love You & Miss You! 


Milk Glass

Hope you had a great weekend!  I'm back with another
Again, these are items I frequently come across at my local goodwill and thrift stores ~ and while prices can range per store and location, these items typically sell for $5 or less.
Our second feature in this mini-series is 
Vintage Milk Glass Vases
While prices on these are going up here in the South ~ they still can be found at a reasonable cost.  Most of mine were purchased for $1-$2 a piece.  The larger hobnail milk glass were purchased for $3-$5.  In antique stores and higher end thrift shops, I've seen the price go as high as $8-$12, but with patience I still frequently see these below $5.
How to Clean Milk Glass
Typically the lower cost will ensure a little dirt and grime ~ a simple solution of bleach and hot water will do the trick!  I let mine soak for about 30 minutes, 
then wash and rinse with dish detergent.
Uses
Milk Glass has been quite popular in the wedding market for the past couple years.  They make for simple vintage centerpieces.  At home, a trio works well on a kitchen counter top, a collection would be well displayed on a shelf and a single vase is a great addition to serving breakfast in bed!  (hint hint husband!)  When entertaining, Milk Glass Vases make for simple decor ~  display your recent garden blooms  when dining al fresco ~ or add them to a table for Mother's Day Brunch or Wedding & Baby Showers.


 What $5 and under find are you currently obsessed with?


How To Polish Silver

Silver Plate Flatware
Confession:  I love polishing silver!  
I know this is weird, but for some reason I find it very therapeutic ~ and of course the instant gratification of something going from dull to shiny is pretty great as well!
My collecting of silver plate flatware started long ago while antiquing with my Mom and Grandma and to this day I'll still buy a piece if the price and pattern is right!
Next week I'll put a post up about how to pick out silver plate flatware, but in the meantime, lets get to the cleaning!
Whether your purchasing old and tarnished flatware or yours is in need of maintenance, the first thing is to find a good and reliable silver cleaner. 
One of my personal favorites is Wright's!  I go back and forth between the cream and polish depending on what I'm polishing.  For silver plate flatware Wright's Silver Cream is great because it comes with its own nifty little sponge that easily does the trick!  
You'll also want to wear rubber gloves while polishing.
In shopping for polishes be careful of the cleaners that are pure liquid ~ while they make the job easy, I've learned the hard way that they tend to strip the silver from the utensils!  
I would avoid these! 
If I'm planning on polishing a lot of flatware, I'll separate them between forks, spoons, etc and typically polish in batches of six-eight.  If newly purchased, you'll want to wash them first to get off any initial dirt and grime. Now to the fun part!
Utility sinks are great if you have one, otherwise the kitchen sink is fine!  I'll start with a dime sized amount of cream on my sponge and vigorously scrub back and forth until the sponge is black from tarnish ~ at this point, rinse the sponge and start again on another fork.  Keep doing this until your batch is finished, but be careful not to have the polish dry on the fork itself.  Rinse the batch in hot water, then start again on 2nd coat.  You'll want to keep doing this until tarnish is no longer coming off ~ this can take just one coat, or I've even had situations where it's needed up to eight!
Once you're finished, wash and rinse using a mild dish washing soap.  
Then use a clean lint free towel to dry and buff your newly polished silverware!
Because I love a good before and after:
BEFORE
AFTER
We use our silver plate for our everyday utensils and on a daily basis 
wash them in the dishwasher.  Just be sure not to wash any stainless steel items 
during the same cycle or it will strip the silver!

Do you collect any silver plate? 
Or have any good polishing tricks?
You know we LOVE comments!


How to Grommet A Pair Of Gloves

Grommet A Pair Of Kitchen Gloves For Easy Drying & Storing 
After completing our Under Sink Storage in our Kitchen, 
we decided to give you a step-by-step in grommet-ing.
Materials Needed:
Pair of Rubber Gloves
Pencil or Pen
Hammer and Hard Surface
4 Sets of Eyelets (two sets for each glove) ~ we recommend size 7/16"
1 Eyelet Tool Set ~ corresponding size 7/16"
**Tip:  Some sets are sold together with eyelets and the tool ~ typically found in the sewing/leather making section of craft stores, in our case we found it to be extremely cheaper to buy these as separates and found them near the stamping section in our store  
For your first glove, you'll need the eyelet tool and 2 sets of eyelets
 When cutting your circle ~ perfection isn't necessary, but be sure not to make it too large.
 On a hard surface, like concrete, NOT counter tops or interior flooring,
first place down the eyelet tool base, then place the eyelet base on top of that. 
 Now go ahead and put one hole of your glove through the eyelet base.
 When hammering, give numerous steady taps until the grommet folds over on itself. 
 Then repeat for the 2nd glove! 
Kitchen towels would also work great with grommets!


Upcycled Wedding Invitation ~ Lucite Tray

Today we're linking up with the Unofficial Pinterest Challenge hosted by 
To see what pin inspired us ~ check out this post!
Upcycled Wedding Invitation ~ Wedding Ring & Jewelry Tray
This DIY is so simple, it doesn't even qualify as a project!
Every newlywed knows what it's like to have tons of leftover stationary from their wedding.  While a couple are placed in scrap books, extras sent to grandparents and relatives, most Brides are still left with a stack.  And after spending plenty of time and money designing them, why toss them out?
Our take on our upcycled invitation was as simple as purchasing a small Lucite tray that our square invite fit perfectly into.  Then we laminated it at our local office supply store ~ ensuring the invite stays neat and clean!
How easy is that?!
Our tray currently sits on our dresser and holds our wedding bands at night.  
A small reminder of a very BIG and special day!
What ways have you chosen to display your wedding memories?


Terracotta ~ Clay Pots

This week I'm starting a mini-series of 
These are items I frequently come across at  my local goodwill and thrift stores ~ and while prices can range per store and location, these items typically sell for five dollars or less.  
To kick start the week, I'm featuring these
Terracotta Pots
The prices on these can range significantly ~ one was found at a yard sale for 10 cents, the two in the middle were 75 cents a piece, the top left was $1 and the taller paneled one was $4.  Proving with enough patience you can still find these for as little as under a $1!  I actually prefer an aged look over their new counterparts  and if you can find them second hand why pay full price?! 
And speaking of pot planters,
 what items are you planning to grow in your garden this year?

.


Welcome to our find it guide ~ our little list of places we love to thrift, shop and antique.
While we've been to all kinds of good shops and markets ~ which we'll feature in blog posts, this place is reserved for the best of the best ~ the creme de la creme!
So click on a state and see the places that always have us coming back for more!
We'll be adding to this list as we go, so be sure to check back often.


Know of a great place?!
Share it with us at ironandtwine@gmail.com


Vintage Artillery ~ Ammunition Basket

Vintage European Artillery Basket
I met a friend for coffee yesterday and she suggested I stop by Antiques & Beyond in Atlanta.  And boy am I sure glad I did!  I came across this European Artillery Basket, used during both World Wars to transport artillery and ammunition.  It's oblong shape is perfect for storage in tight places and would be perfect in an entry for umbrellas or in a kitchen to store cookie sheets and cutting boards.

Pinterest Challenge

It's hard for us to believe that we've been married for over three years!  
And even crazier, there are still so many items from our wedding 
that we still haven't put to use.  
 So with today's announcement of the 
we figured it's the perfect excuse to get inspiration from another crafty blogger!
Inspired by Christy's Wedding Invitation Ornaments that hit the Pin-o-sphere pretty big last fall ~ we're setting out to create a simple upcycle for our leftover wedding invitations.
 Check back next week to see what we come up with!

Do you plan to join in the fun?  If so comment with a link to your post!


Vintage Cruise Ship Menu

1960's Transatlantic French Line Menus
All the credit for this find goes to my Mom!  While at a local antique store, she came across a stack of vintage cruise line menus.  For just a couple dollars a piece my grandmother and I picked a couple to take home.  My Grams took home a pair of brightly colored Italian Cruise Menus (correct me if I'm wrong on this) and framed them in her kitchen ~ they go great with her color palette and make for a great conversation piece!  I plan to frame ours and think it would be fun to fashion a brunch after one of the menus! 
 

Any cruise line finds in your home?

Vera Neumann Scarves

Vintage Vera Neumann Scarves
I love these vintage scarves for their vibrant colors and bold patterns!  They're getting harder to find (at a reasonable price point) ~ so when one is found I'm sure to scoop it up.
I'm a huge fan to tie one around market totes and beach bags!  
In this case the navy + green goes great with my Sea Bag Tote.

Do you collect any scarves?  If so what do you use them for?

Vintage Dictionary Art

Vintage Funk & Wagnalls Dictionary
I came across this old dictionary at a local thrift store for $2.  I love collecting old books and have recently been seeking old dictionaries to display on a bookshelf.
This one caught my eye with its aged patina and the endearing index card that read 
Our Grandmother's Dictionary ~ honestly it made me a little sad that someone would get rid of this.  The original owner's name is still visible on the front cover ~ in cursive of course!
Throughout the pages are intricate pen and ink drawings, amounst the K's was a page dedicated to Different Types Of Knots.
Being that I'm in the middle of a nautical kick ~ I couldn't help but turn this into framed art for our bathroom. I went to a local office store ~ asked they inlarge the image to poster size (I knew this would slightly distort the image), then framed it!  The cost to print was $25 ~ I had a 20% off coupon, which made it $20.  The frame was another thrift find for $10.

Here's the all-in-one pic should you wish to Pin it!

Baked Green Bean Fries

 OK, OK, this is NOT a food blog, but I just had to share.  When I had a craving for french fries tonight, I decided to make these instead.  I've had the parmesan fried versions at restaurants, but decided on a healthier take by baking them for 
Baked Parmesan Green Bean Fries!
And I must say, they really curbed the craving!
To Make:
Preheat Oven to 425
Fresh Green Beans (I'm sure frozen would work as well)
Wash + cut ends, then toss with garlic powder, salt, pepper, parmesan cheese and olive oil
Place in single layer on cookie sheet and bake for 12-15 minutes
For extra crispy broil for an additional 2-5 minutes
Enjoy!

Do you know of any healthier takes on sinful foods?
We'd love any suggestions!

Vintage Maps

Vintage Maps
We love vintage maps, so when we came across a HUGE lot of them at My Favorite Place, we spent some major time going through them.  And for 25 cents a piece it was time well spent.  We ended up taking home  about 50 ~ ranging from the 1930's through the 1970's.
Vintage 1964 New York Map
We framed this map with a frame purchased at Goodwill for $8 and the bottle was bought for $4 at a local thrift store ~ making this vignette a whopping $12.25!
We also chose to frame this 1950's Western Europe Map and hung it in our living room.
The frame was another Goodwill find!

Have you found any vintage maps?
You know we LOVE comments :)

Vintage Silver Plate Martini Shaker

On our trip to Florida last week, we found this hand hammered martini shaker.  Made by Taber & Tibbits Inc. ~ produced between 1919 and 1941.
The reason we were sold on this one was because of the unique juicer on the inside lid ~ perfect for lemons, limes or of course oranges.  It says patent pending and we think a pretty rad idea for the era!

DIY Anthropologie Tablecloth

Happy Happy Monday!
No snow here in Atlanta, but boy has it been gloomy!  So to add a some color we took on this DIY over the weekend.  Let me first rewind and explain how this started...
 I found this leftover bolt of canvas at a local thrift store ~ for $5!  So for $1/yd we left with about 5 yards of fabric.  It was then time to hit the world wide web and get inspiration for a DIY tablecloth.  We found everything from stripes to confetti, painted and dip dyed, here's a few that caught our eye:

1.2.3.4.5.

When I came across the Brooks of Bohemia tablecloth from Anthropologie I loved how fun and vibrant the painted piece was.  Keep in mind the original is Linen, handmade in Australia and is pretty much a work of art therefore the steep price tag.  After doing some additional research I found our that you can Paint Rit Dye!!!  Did you know that?!  I've never used Rit Dye, but figured this would be a good first!  

Here's what we used to DIY our own:
2 yards of found Canvas, $2
Rit Dye, Color: Fuchsia (purchased at Hobby Lobby with 40% off coupon), $2.27
Rit Dye, Color: Petal (purchased at Hobby Lobby with 40% off coupon), $2.27
Rit Dye, Color: Pearl Grey (purchased at Hobby Lobby with 40% off coupon), $1.37
Plastic Wrap, we already owned
Painters Tape, we already owned
Making our Grand Total w/ Tax = $10.46

We know that we scored on our fabric find, but other ways to save on fabric:
White Tablecloths at Thrift Stores (we've seen them for as little as $1-$5)
Canvas Drop Cloths (we've seen these sold for $10-$20)
Leftover fabric on sale at Fabric Stores

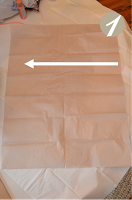
To get started you first want to measure and cut out your fabric ~ if you plan to use it as a tablecloth you may want to go ahead and sew edges.

2.  Place down plastic wrap on the surface you'll use, then tape down your fabric.  We also chose to tape off our lines to be sure we made them somewhat straight, but still wanted to give this an authentic painted look ~ not perfect.

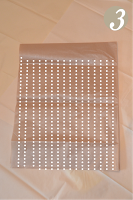
3.  Mix the Rit Dyes according to the labels ~ because it calls for VERY hot water you may not want to mix all the colors at once.  We mixed as we went.
4.  Paint on the Rit Dye using your foam brushes.  Depending on the color you may need to give several coats.  To get the colors we used above go with the following:
from left to right
1.  Dove Grey ~ we diluted ours pretty heavily
2.  Petal with a teeny bit of Fuscha mixed in
3.  Petal with a little dove grey mixed in
4.  Fuscha
5.  Petal with a little dove grey mixed in
6.  Petal
*TIP* Depending on fabric and color, your dyes can look VERY different, we had extra swatches we practiced on and would mix until we got the right consistency.  You can place these swatches between plastic wrap, then put them in the microwave for 1-2 minutes.  This will show you the color when dried.
 5.  Paint on your colors ~ again, the sloppier the better!  Once all colors are on, wrap the entire piece in plastic wrap.
 6.  Depending on how large your piece is this may or may not work for you.  Fold fabric, continuing to place plastic between layers and place your piece in the microwave ~ in the same way you did the swatches above.  Our piece was a little too big to benefit from this, so we let it dry overnight.

7.  If you want to set the colors, place under cold water until the water runs clear.  If your piece faded more than you wanted, let it dry then do the process again.  Once you're happy with tone, and cold water runs clear, you should be good to go to wash your new tablecloth in the washing machine!
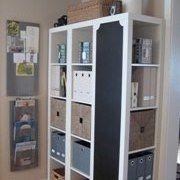
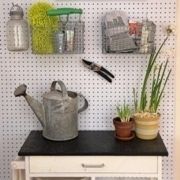
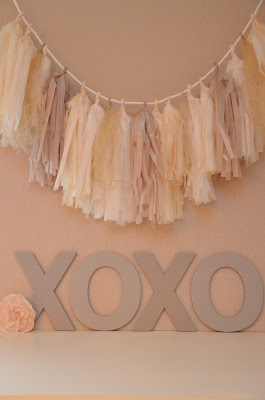
While our studio set up is more than pitiful (gotta love DIY!) ~ not shabby considering we spent a fraction of the cost!  
Final Tip:  If you  want your Fuchsia stripe to be more vibrant, you may want to try a neon pink Fabric Paint!  

Psst!  Got $20?  Love a good thrift shop?  Then check out YHL's latest challenge: 

The (Completely Unofficial) Macklemore Thrift Shop Challenge

Vintage Martini Shaker

 Our last find from our Ellijay outing was this 
Silver Plate (Forbes Silver Co.) Martini Shaker
 
 This happens to be a new collection we've started and what drew us to this one was the engraving of individual drink recipes on the top rim.  We got a kick out of some of the names and thought the Clover Club would be a fun drink for St. Patrick's Day and 
Horse's Neck would be fitting for the Kentucky Derby.  
If you're in the mood for a cocktail Mad Men Style, here's the full list below:

ALEXANDER
1/3 BRANDY
1/3 CREME DE CACAO
1/3 FRESH CREME

BACARDI
1/3 GIN
2/3 BACARDI RUM
TSP. GRENADINE
JUICE 1/2 LIME

BRONX
1/3 GIN
1/3 FRENCH VERMOUTH
DASH ANGOSTURA BITTERS
JUICE 1/4 ORANGE

CLOVER CLUB
2/3 GIN
WHITE OF EGG
JUICE 1/4 LEMON
1/6 ITALIAN VERMOUTH
1/6 RASPBERRY SYRUP

GIN FIZZ
SMALL GLASS GIN
JUICE OF 1 LEMON
TSP. SUGAR SYRUP
SODA WATER

HORSE'S NECK
1 LEMON RIND
TSP. SUGAR
DRINK GIN
ICE AND GINGERALE

MANHATTAN
2/3 RYE
1/3 ITALIAN VERMOUTH
1 DASH ANGOSTURA BITTERS

MARTINI
2/3 GIN
1/3 ITALIAN VERMOUTH
1 DASH ANY BITTERS

OLD FASHIONED
1 GLASS RYE
1 TSP. SUGAR
2 DASHES ANGOSTURA BITTERS
LEMON PEEL
SLICE ORANGE, CHERRY

ORANGE BLOSSOM
JUICE ONE ORANGE
GLASS GIN

SIDE-CAR
1/3 BRANDY
1/3 COINTREAU
1/3 LEMON JUICE

STINGER
1/2 BRANDY
1/2 WHITE CREME DE MENTHE

TOM COLLINS
TSP. SUGAR SYRUP
JUICE 1 LEMON
1 PORTION GIN
ICE AND SELTZER

WHISKY SOUR
TSP. SUGAR
JUICE 1/4 LEMON
GLASS RYE OR SCOTCH