Kitchen Metro Shelving

I LOVE our metro shelving in our kitchen!  
Well, truth be told, technically it's Intermetro Shelving.  What's the difference?
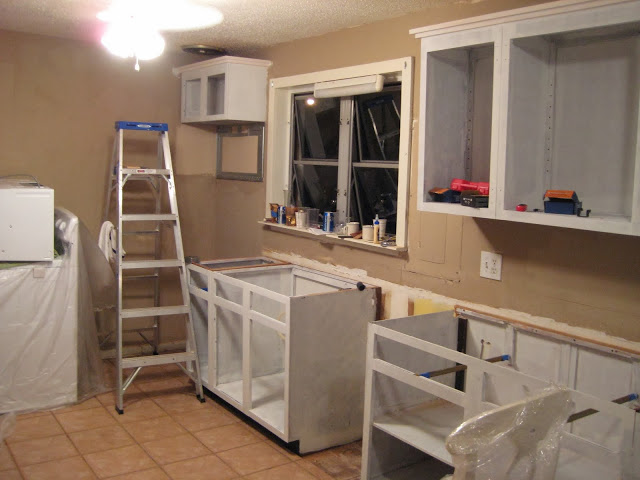
Mainly the amount of weight the shelves can support.  The Metro Commercial Shelving can hold up to 800 lbs per shelf, while the Intermetro Shelving can hold 300-500 lbs each.  Obviously, this variation makes the commercial grade more expensive.  Color is different as well, the commercial is chrome, while the intermetro is silver.  I personally preferred the silver, the chrome was a bit more industrial than I wanted, and knowing what I planned to use the unit for, the intermetro worked perfectly given the weight limits.  I also want to note, there are a lot of similar units out there, so be sure to check weight limits on the individual unit you're looking at ~ from the research I did, you can find cheaper options, but typically that also limits the amount of weight per shelf.  So, consider what you plan to use it for before purchasing too little or too much in what it can hold.  I lucked out when I found two floor samples, with four shelves each, for a steal at my local Container Store.  They happened to be on on 34.5" posts ~ too short for what I needed.  But that's the great part about this unit, you can change them whenever needed.  So I purchased eight, individual 62.5" posts, and reconfigured the shelves.  This is what our shelves looked like:
Rather than use the unit as a pantry, I opted to use it as a functional space, storing kitchen wares we use the most while also displaying some of my vintage finds.
Our everyday dishes and wooden spoons displayed in antique silver...

Rosemary for easy use, a pitcher along side glassware...

It's even great for storing larger items that don't fit in our cabinets,
 like our three tier server and drink dispenser...

For those of you that saw the unit in our almost finished kitchen reveal, you may have noticed a difference in styling along with an addition of another shelf.  Again, why I love this unit!  As our needs change we can easily customize the piece.  Here's what the unit currently looks like...
I love changing the unit up seasonally.  This time of year I do more baking, so it was only fitting to pull out my KitchenAid and place flour & sugar canisters for easy access.
 And everyday serving items, like plates, soup bowls and silverware can easily be grabbed for easy access and quick serving...
 The key to making the unit looked organized and not cluttered is to keep like items together and create similar groupings.  If possible try to stay with a consistent color scheme and display items you use the most.  Obviously if you're using this in a pantry or for storage elsewhere it's a great storage option!  In our case, we're using it in our kitchen and we wanted it to feel more like open shelving rather than just another storage unit.  For example I only display my colorful Fiestaware during the summer months, and pack them away when not in use.  Making this shelving fit my needs whether it be seasonally or allow extra space when hosting a dinner party.  Baskets at the bottom add warmth to the look, while also adding additional function.  
And best of all I love displaying recent vintage finds and those pieces I love the most like these old demijohns...
One final tip:  if you're looking to put one of these in your kitchen and/or use it similarly to how we did, buy the clear shelf liners!!  They're expensive as all get out, but oh-so-worth it!!  Especially if your placing glassware, or smaller items like bowls and plates it helps give a flatter surfaces for them to rest.  I tried going without these at first and found out that wasn't a good idea.  So if going with this unit, I'd suggest making the further invest in the liners!  Also when putting this unit together, purchase a white mallet ~ it won't smudge like a black one did for us and it won't ding the shelving like a hammer will.

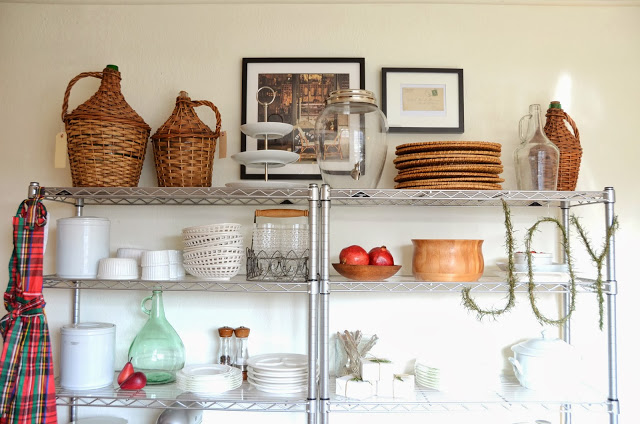
What storage solution are you currently loving in your home?


Our Almost Finished Kitchen Makeover | Before & After

For those of you that have been following along with our Kitchen Makeover Series, I'm back today to finally share the end (well almost end) result.  For those of you just joining us, be sure to check out the story from the beginning here.  Like I've said before, this kitchen makeover has been 3 years in the making and still has a ways to go ~ a backsplash is the most prominent item needed.  So while this journey isn't completed, Brian and I have enjoyed the ride!  Here's what our kitchen looked like in week 1:
And here's what it looks like today:
We knew we wanted to refinish the cabinets, and replace most everything else...
And that's exactly what we did...
We installed pendant lights over the sink...
Moved the placement of the dishwasher and installed a farmhouse style sink...

Replaced the light above the fridge...

And installed hardwood floors...

We purchased appliances...

 And added metro shelving for additional storage...
And there you have it...our almost finished kitchen!
 I'm working on an all-in-one post that will include a buying guide for everything used in our kitchen makeover.  It will give a list of sources along with an approximate cost of the total renovation.  But in the meantime if you have a question, please feel free to ask in the comments below!

Let It Snow!
The letterpress garland shown above is from Red Bird Ink ~ I'm obsessed!!


Thanksgiving 2013 | Our Holiday Recap

I'm feeling oh so thankful after this weekend!  This was our first year hosting and everything seemed to work out beautifully (with a little help from our guests) ~ the bird cooked evenly, the sides made it to the table in one piece, my sister-in-law made the most beautiful & tasty apple pies and all was joyful!  I hope all of you had a very fun & fulfilling Thanksgiving Holiday!  Before I go make one more turkey sandwich, I wanted to share some pics from our Thanksgiving day... 


How was your Thanksgiving?
Have you eaten all the leftovers yet?!  Or better yet started decorating for Christmas?!   

Kitchen Makeover | Part 5: Going Against The Grain

After a minor setback with our kitchen ceiling, shared in Part 4, we were only left with 2 days to finish our floors...
And like most of you know, when it comes to DIY the key is flexibility!  The reality of the situation was that two days wasn't enough time, so rather than get all bent out of shape, we chose a new stopping point for the week.  If we could get all the old tiles removed, then the following weekend we'd be able to pick up where we left off.  Armed with our new plan and a crowbar, we started ripping up the old floor: 
It came up quite easy, just a bit of elbow grease ~ large pieces were placed in industrial trash bags and small bits were vacuumed up.
Once the old tile was removed, we removed the moulding.
Then on to the fun part!  When it came to the sub floor, we had a huge inkling that the original wood floors were hidden underneath, but after having that same inkling with the ceilings, we now weren't sure.  So we held our breath and hoped for the best as Brian removed a large section:
And low and behold there it was, the original wood flooring!  As we kept removing the sub floor, more and more of the original started showing through...
 ...until we were only 5 feet to go, and this happened: 
 Yup, this kitchen was full of unexpected surprises!  It's hard to see in the photo above, but the large diagonal wood boards were not only different from the rest cosmetically, but they were poorly executed.  You could see straight down to the dirt below through the huge gaps and in some cases large holes that existed.  Our initial thought was to remove the large boards and replace them with wooden slats similar to the originals.  But upon further inspection this really wasn't an option.  A) matching flooring can be difficult B) there would be no way to make the flooring even, due to the way this addition had originally been added.  Let me remind you, this entire time we had planned to simply re-do the original wood flooring, not have to install and buy new.  We were already behind schedule at this point, but we knew flooring could sometimes take weeks to order & deliver, and we really were hoping to start again the following weekend.  Ideally, we LOVED the idea of finding reclaimed wood that would match the rest of our house, but due to a limited time table we decided to forego that option.  Instead, we spent the entire next day driving around town, trying to find a budget friendly wood flooring that was available within the week.  We spoke to a lot of great sales associates about our situation and flooring options,  but none of them seemed to understand what we really wanted.  Every single one of them was pushing us towards brand new, top of the line flooring.  I don't know if it was strictly from a commission stand point, but most of them kept saying how "It's a kitchen...it must be amazing...you use the kitchen the most & you must love it...if you're spending the money, you might as well upgrade...go with something different and you can replace the rest of the house later...etc, etc, etc".  But I didn't want to change the flooring in the rest of the house, I liked the rustic, worn look.  And if we were going to break out the big bucks on top of the line flooring, I would have rather spent the time finding meaningful reclaimed wood (like from a barn or some old estate in Europe).  I like old and I didn't want shiny & new.  But every sales associate said the same thing, "Well, there's no way to match it, so you might as well go completely different ~ here's new & shiny and oh by the way it takes weeks to arrive...."  So, I did what any DIYer would do, I took matters in my own hands.  And there in the back corner of a store was a Red Oak that seemed perfect!  
 We were advised against it, because it had a lot of knots and it was rustic (like that's a bad thing?!!), but in our minds knots add character & rustic is right up our alley!!  Plus, the price tag was one of the cheapest wood flooring options we had seen. So, when we asked how long it would take to get in, he said, "Oh, that stuff hardly sells, we have a ton in the back" ~ BINGO!!  So after a few "Are you sure?!" from the sales associate, we paid for the rustic, beat up wood and brought it home!  Here was our thought process:  From the get-go, we have never sought out to make this home top-of-the-line ~ we purchased a fixer upper, and that's what we intended to do ~ fix.it.up!  We're not trying to make this house something that it's not.  Worst case scenario...we end up hating something, like ok, maybe we end up hating the rustic, beat up floors we just bought.  Should we end up staying in the house long term, we can always re-do them, and by not spending a ton of money in the first place, it only makes that decision a lot easier.  So we loaded up our rustic flooring and headed home:   
Over the next week we allowed our flooring to acclimate then got to work the following weekend:
While Brian started installing the flooring:
  It was my job to organize the pieces and lay out the design:
We kept going...
And surprisingly were able to get the floors completely installed in one day!
 For those of you still reading ~ I hope you're not bored to tears!  I can't wait to show you our almost Finished Kitchen!  I emphasize almost as we still have yet to install a back splash, but it's about time we reveal what our kitchen looks like now!!  Did we paint or stain the floors?  What color's on the wall?  All of that & more next Monday with our Kitchen Holiday Reveal!  In the meantime, we'll share some festive Thanksgiving posts for the remainder of the week!  So be sure to stop back by tomorrow!

Like always thanks so much for spending part of your day with me!! 

Kitchen Makeover | Part 4: Expect The Unexpected

For an entire year we lived with our kitchen looking like this:
Not too shabby, but we knew the ceiling & floors had to go.  The thing holding us back that year wasn't the task itself, but rather knowing the time needed to finish it.  We love weekend projects here~ it allows you to make a mess, finish the task and have it all cleaned up before the start of a new week.  With removing the ceilings, we knew it was going to be super dusty and super messy, and the thing with a smaller, older home, is that no matter how hard you try, dust and dirt go everywhere in the house.  So, we figured if we were tearing down the ceiling we might as well rip up the floors at the same time.  Make one big mushroom cloud of dust and complete the projects in one big go.  And that required both of us taking vacation time from work.  So after putting it off for an entire year, we finally planned a week for us to tackle the task!  
_______________________________________________

When we purchased the house, pretty much all of the rooms had popcorn ceilings.  They hadn't been installed properly so all of them sagged and dipped in the center, making for a pretty obvious eye sore.  When tearing down the guest bedroom ceiling, we were pleasantly surprised to find the original wooden slat ceiling underneath and we also found the same in the dining room ~ so when it came to the kitchen, we expected to find the same... 
Yeah, not so much.  When we took down the popcorn ceiling, we were more than shocked to find that with the ceiling, came down a whole lot of dirt, dust, old insulation, and dead bugs but NO original wood ceiling.  Brian & I were already cutting it super close to get everything done within one week.  We had planned to spend only 3 days on the ceiling ~ day one, taking it down and cleaning up debris ~ day two, sanding and filling in gaps in the original wood ceiling ~ day 3, painting.  This timeline gave us 4 days to complete the floors.  But with the discovery that we now had no ceiling at all in the kitchen (it just went straight up to the roof) ~ we had to make some adjustments.  The next part was pretty much a blur and I'm thinking I may have even blacked out: I remember a couple frantic phone calls to my dad, multiple trips to Lowes, a hilarious incident of installing insulation for the first time, my Dad somehow showing up and the three of us nailing bead-board onto the ceiling.  When I finally came to this is what I saw:
Yah!  A bead-board ceiling!  That was easy ~ well not exactly, but we made it work!  
Now that we were behind schedule, we were only left with two days to complete the floors before our vacation time was up....

We'll be back Monday with Part 5!

Kitchen Makeover | Part 3: Are We There Yet?

Momentum.
That's what we had after Part 2 of our kitchen makeover.  The destination was starting to feel like it was right over the horizon, if we could just get to the top of the hill we'd see it.  So that's what we did, we kept striving towards the finish line.  After debating paint colors we finalized on Benjamin Moore, color Marscarpone  for the kitchen cabinets.  We loved that the warm hue complimented the butcher block counter top, but still worked with the white appliances.  So after purchasing the paint we got to work.
From there we also decided on new hardware...
And a sink & faucet... 
Finally, our kitchen was functional and we were getting closer to our destination!
 But like any good road trip, there's sure to be a couple detours along the way.  We quickly became busy throughout other parts of the house, finishing a guest bedroom, re-doing the entire front porch, adopting Rawley and so on.  So as life kept moving forward, our kitchen makeover was quickly left behind.  For an entire year.  Yup, that's right, our kitchen stayed like this for an entire year!  That destination that seemed so close, now felt so far away.  We knew when we bought this house it would be a process, and we kept reminding ourselves that Ralph said it best, Life's a journey, not a destination, but sometimes, even if you're enjoying the ride, you can't help but ask Are We There Yet?

The floors? The ceiling?  See what project we tackle in Part 4 tomorrow.

Kitchen Makeover | Part 2: It Takes A Village

 After sharing Part 1, we're back with the next phase of our kitchen makeover.  After having my demolition outburst out of the way, Brian and I were left with a completely un-workable kitchen.
No appliances, no counter top, no kitchen sink and no game plan.  So that week, Brian and I started coming up with ideas, setting a budget and making a plan.  But those were quickly put on hold as we were moving into the house the following week.  Looking back, I laugh out loud thinking about how completely absurd the situation was.  Here we are moving into a complete fixer upper with no real experience, and rather than being stressed we were over-the-moon excited!  There's one reason, and one reason only, as to why we've had the luxury of enjoying the process rather than becoming completely overwhelmed by it:
Family.
Brian and I are both extremely blessed to have an amazing support system that we call our family!  None of our immediate family live in Atlanta, let alone the state of Georgia.  Brian's from Portland, Maine and I'm from Charleston, SC ~ how we met and ended up in Atlanta is a story for another day ~ but the fact that both sides were excited for our first house and willing to make the trip down to help out, speaks volumes to the people they are!  Our tiny apartment was located on the third floor with no elevator and had amassed quite a bit of stuff, large and small, so when my parents offered to help us move we were thrilled!  Even my brothers made the trek ~ two coming all the way from college.  Everyone drove out of their way to move a lot of items down 3 flights of stairs then have to unpack it all elsewhere ~ doesn't sound like fun,  but no one complained:  I mean look at these smiles...

 
 With so many extra hands on deck, the move ended up being extremely fast and cheap.  None of that was possible without our family.
_____________________________________________

Now that we were officially moved into the house, it was crucial to get the kitchen in working order.  We knew we wanted to replace most everything: the ceiling, the floor, etc, but wanting to stay on budget, we decided to start our makeover with the essentials.  And after eating too much take out that first week, we knew it was time to buy appliances.  So after doing some research and signing up for a ton of new home buyer coupons, we found a great deal on a GE set at Lowes.  (note:  I'm working on a post to highlight all sources for our kitchen makeover, so I won't include specifics here)  With appliances ordered, we came up with our game plan.  Salvage the existing cabinets by painting them, add a budget friendly counter top and a sink to make our kitchen functional.  The idea of painting cabinets seemed simple ~ you just slap a coat of paint on, right?!  Those days, ignorance was bliss!  Upon further inspection we noticed our cabinets needed much more than a coat of paint!  Not only were they filthy, but due to the significant ware, they needed to be full-on restored.  And when mapping out our kitchen design, we really wanted to move the placement of the dishwasher closer to the sink.  Case in point:
We quickly realized the only way to accomplish this ambitious task was to call in the pros!  Lucky for us, once again this was family.

Brian's parents have a boatload of experience when it comes to restoring houses, so when they offered to fly down one week after we moved in, we were beyond grateful.  And oh-my-goodness, they are the unsung heroes of what are now our beautiful kitchen cabinetry!!  Not only did they help remove every single piece of cabinetry, they sanded, and cleaned, and sanded and cleaned, and sanded and cleaned until those things looked brand spankin' new!!!!  And all of this while I was away at work!  I know, they're awesome, right?!  And thank goodness they were down during this process, because with any fixer-upper there's always those unexpected projects.  And unexpected projects means extra time and extra money.  Side Story:  The hands- down best advice we ever received from buying a fixer upper came from a guy at Lowes ~ he told us no matter how much you think it's going to cost and no matter how much time you think it'll take, multiply by 3!  So if you think a project will take 1 hour and $100, plan for 3 hours and $300.  This sounds crazy, but owning this home for 3 years, this concept couldn't be any truer!!  Ok, back to what I was saying:  When the bottom cabinets were removed we were given an unexpected surprise.  A slew of unmentionable critters had made a comfy little home right there under & behind the cabinetry.  And apparently this had been a very desirable place to live as there was a history of past tenants.  Seriously? In a kitchen? Gross!  Here's the photo after all the really awful, graphic grossness had been cleaned:
Once all was clean, and the source of the problem was determined, Brian's dad helped seal off any holes to the outside and then helped sheet rock behind the cabinetry:
Before they left, Brian's Dad helped re-install the cabinets and left us with one more gift of greatness.  In an inspiration photo I had shared with Brian's parents, there was this super simple trim on the top of the cabinetry.  Brian's dad had secretly done it for me when I was away at work ~ it's a little thing that made a huge impact!  Again, none of this was possible without our family.
_____________________________________________

So with Brian's parents now gone, we were finally back to where we started, wanting to paint the kitchen cabinets, add a budget friendly counter top and install a sink.  But once again, life seemed to get in the way, we were both working full time and had started a plethora of other home improvement projects throughout the house. So over the next two weeks, we slowly started priming the kitchen cabinets.  
For a counter top we decided to go with butcher block.  We loved the look and warmth it brought to the space and the price tag was very appealing!  To save money we opted against having a custom piece of butcher block cut ~ in order to accommodate our very long counter, we needed to piece together two slabs of butcher block purchased from Ikea.  Having only been in the house for a months time, our arsenal of power tools was minimal.  Once again, my dad not only offered to let us use his tools, but also to teach us how to use them!  Before installing the counter tops, my dad helped hook up our dishwasher and water connection to our fridge. When we bought our fridge, having a water hookup didn't even cross our minds ~ because the automatic ice and water dispenser magically makes it's own ~ Duh!  So once water was flowing and a dishwasher connection re-wired, we were finally on our way to a functional kitchen.
Looking back, this entire situation is humorous, I mean, how ignorantly stupid were we?!  Our families were so supportive and patient with us during those early days, kindly pointing out all the things we had overlooked, but never making us feel stupid for doing so.  They've cheered us on when things get hard and have assured us they're a simple phone call or plane ride away ~ teaching us the true meaning behind It takes a village. in our case, to make a house a home.

Part 3 tomorrow...I promise this time:)

Kitchen Makeover | Part 1: Diving In Head First

With Thanksgiving next week, Brian and I are super stoked to host our first family holiday at our house!  And not any too soon as our kitchen is finally almost finished.  I emphasize almost finished as we still have one final project and let's be honest a fixer-upper is always a work in progress.  But this week we're feeling especially thankful for this house, and enjoying every step of the way as we make it our home.  So let's take a little trip down memory lane to kick start kitchen week here at Iron & Twine...
________________________________________

Rewind three years ago to May 2010.  We were just handed over the keys to our very first house.  And we couldn't have been happier!  We weren't naive enough to think our fixer upper would get finished over night, but we were just crazy enough to dive in head first.  Don't get me wrong, a fixer upper isn't for everyone and I totally understand that, but for those of you just crazy enough to take on the task it will be the most challenging and most rewarding project of your life (this is coming from someone that has yet to have kids, so I'm sure this experience will be second fiddle in the future:) ~ but for Brian and I, this house has been a test in patience, a lesson in team building and overall a journey filled with joy. It was the kitchen that sealed the deal on this house.  Compared to the other houses we had looked at at the time, this kitchen was GIGANTIC and it was the first house in our price point that didn't have a washer & dryer hook up located in the kitchen.  Now I'm sounding like an episode of Property Virgin's ~ relocating a washer & dryer isn't a huge deal, but for the amatures that we were at the time, it was a deal breaker.  So back to the kitchen ~ it was beautiful!  Broken dishwasher, no other appliances and yet to us it was our dream kitchen!    Case in point this photo from our first walk through:
Ok, so it wasn't magazine worthy, in fact it was completely filthy, but we saw the potential.  House Sold.   When we moved into the house, our lease at our apartment wasn't up for another month, so we thought it was the perfect time get a head start on the house.  Like most first time home owners we didn't quite know where to start, and like most newlyweds money was tight.  So while we had BIG plans for the kitchen, we decided they'd have to wait.  Besides, on day one we had accidentally on purpose, started tearing the ceiling down in what's now the guest bedroom, but that's a story for another day:
During the first two weeks we worked nightly on the guest bedroom and I spent hours daily scrubbing and cleaning the kitchen.  I was determined to get it clean enough to cook and eat in and make it work for the time being.  Now this is the part you skip if you don't like gross stuff:

There was dirt & grime & critter poo everywhere in that kitchen ~ and I mean everywhere!  It's why we felt like it was totally normal and ok to store our lawn mower in there those first weeks:  
I'm pretty sure the counters hadn't been cleaned since they had been installed (many many years before), grout was coming out of the the tiled counter top, the faucet and sink were leaking.  Somehow these details escaped us during the house buying process ~ truth be told we just chose to ignore them ~ rose-colored glasses.  So, one day when Brian was at work, after giving it my very best cleaning effort, I lost it.  Like ugly-cry-face lost it.  In that moment I truly thought this house had won.  That the kitchen I had dreamed of would never happen, that we had made a mistake.   So I did what any reasonable person would do, I picked up a hammer and a crowbar and just started swinging!  Ladies & Gentlemen, if you have never demolished anything, I assure you it's life changing.  It's kind of like singing at the top of your lungs when you're alone in the car meets sprinting as fast as you possibly can.  It's exhilarating and exhausting all at once.  It's why I love polishing silver ~ one minute it's awful, the next it's a clean slate, a new beginning.  And once you start demolition there's no turning back.  So I kept going until the entire tile counter top was gone, the sink ripped out and the dish washer removed.
When Brian returned home that evening from work, he looked at the kitchen, looked at me and said "I guess we're doing this!"  And there starts our kitchen journey.  It's been three years in the making and we wouldn't change anything about the process, it's created some great memories, left us with some awesome stories and has taught us a whole bunch of life lessons.  Sometimes, the risk is indeed worth the reward and sometimes you just have to dive in head first.  Life will always bring on new challenges, and while some journeys only take a matter of minutes, like polishing silver, others may take years, like a kitchen renovation.  But you will finish and you will feel awesome!  So, I challenge you friends to dive in head first ~ whole heartily take on a task that you never thought you would.  Sing at the top of lungs and sprint as fast as you can...

Stop by tomorrow for Part 2.


Pinterest Inspiration | Curator's Edition

I'm back today with some more amazing Pinterest Curators!  If you're new to Iron & Twine or missed the first post, be sure to check it out here.  I'm always seeking inspiration and striving for a Pinterest page that motives and inspires me to live a more productive & joyful life.  The key is to follow amazing curators ~ think the people in museums that pick and display the art work.  A good Pinterest pinner can introduce you to new ideas, new blogs & websites, and open you up to a whole new world of creativity.  While I love following industry experts, some of my absolute favorite pinners aren't those with fancy websites or blogs of their own.  They're my real-life family & friends, people I've met through Iron & Twine and strangers that I stock through Pinterest.  Today I want to introduce you to another four of my favorites.  If these women were editors of their own magazines, I'd be sure to be a subscriber! 
 I hope you'll visit their Pinterest pages 
and follow them for continuous inspiration!  
In the meantime, here's a small sampling of their curated work.

 1.2.3.4.5.6.7.8.9.10.11.
Faye's pins are like fresh laundry on a Spring day ~ Clean, Antique & White!  With shabby chic on it's way out, Faye's picks will have us all reconsidering!  Her Things to Collect board makes me oh-so-happy and who doesn't love a board dedicated to Blackboards?!  Be sure to check out more of her pins here!
_________________________________________________________

1.2.3.4.5.6.7.8.9.10.11.
Caroline's Pins will make you want to pack a bag and go on an extended holiday.  I love her preppy yet casual style and her sense of adventure is apparent through her pins, case in point her Wanderlust board!  And for the dog lovers, her A Few of My Favorite Things board will have you oohhhing & awing over some adorable pups.  Go check out all of her Pins, you'll thank me later! 
_________________________________________________________

 1.2.3.4.5.6.7.8.9.
Part whimsy, part Anthro Chic, Emmy's Pins make me squeal with glee!  If this girl threw a party I'd be sure to crash it!  If you love polka dots as much as I do, don't miss her board dedicated to just that, Dots!  For more inspiration check out her boards here!
_________________________________________________________

1.2.3.4.5.6.7.8.9.10.11.12.
Meredith's Pins are the perfect mix of Classic & Eclectic!  Her choice in color hues are my all time favorites ~ navys, blues, greens & naturals!  From her For the Home board to her Products I Love board, her style is timeless yet attainable.  Be sure to see all of her pins here!
_________________________________________________________

So go grab a cup of you-fill-in-the-blank and go get lost in the world of Pinterest, but just for a bit, you have my full permission!

What ways do you ensure that Pinterest is no longer a chore?!
You know I love it when you share!

Indoor Games & Toys To Entertain Your Pup

 With the weather getting colder and occasionally more stormy, Rawley can easily become bored while stuck indoors.  So today we want to share with you a couple games that he loves to play, along with the toys that have stood the test in our household.  When we first got Rawley, we assumed every single dog loves to play fetch.  Well we were wrong.  Throw anything, a ball outside or a toy indoors, and Rawely gets bored super fast.  He may fetch it once, twice if he's really outgoing, then he's done.  We learned really quickly that Rawley prefers a bit of a challenge and loves to have to seek things out.  There are two games that are his all time favorites and are typically played at least once a day in our household.

FIND IT
Ask him if he wants to play find it and he freaks out!
When he was a puppy he was crate trained, and as he got older we wanted to allow him free range of the house when we were gone.  We had read that it's typically in the first 30 minutes after you leave that you'll dog do house damage, chew the furniture and rip up a pair of shoes ~ basically as punishment for leaving them.  A friend suggested to hide a couple treats around the house right when we leave, this would help distract him and keep him busy for a bit.  So we gave this game a shot and it's become a favorite ever since.  We started out by leaving kibbles in obvious places and as he's gotten older and smarter the game has become quite challenging.  Brian and I break small milk bones in half and hide them in hard to find places ~ hidden under his blanket, behind curtains, on low shelves, in the bathtub, behind doors, under our bed, etc etc.  We don't hide them in furniture cushions or anywhere that would encourage digging, but we do try to place them in not so easy to find spots.  But we also take into account safety, we wouldn't want him to get hurt trying to get to one.  So whether we're leaving the house for a bit, or he just needs some afternoon stimulus, we'll tell him to sit and have him stay while the pieces are hidden.  Then we say Find It and he goes tearing through the house like this:
Rawley's other indoor favorite is good ole fashion Hide & Seek.  It works best when Brian and I are both home.  One of us hides the other stays with Rawley and counts to 10.  Rawley loves this game, like over-the-moon happy!  He'll methodically go through the house ~ he now knows the typical hiding spots and will check those first, Brian and I are now getting insanely creative with where we hide.  I'm sure there's times when the neighbors wonder: what in the world is going on in that house?!  When Rawley finds you, he lets out one bark of joy and that tail wags faster than I've ever seen!  It's actually quite exhilarating, I find myself trying to stay as still as possible and holding my breath, because this pup hears EVERYTHING!  

As far as toys go, I'll tell you we've just about tried it all!
For a long time we kept buying the cheap plush toys, they would only last for a few minutes as Rawley would rip them to shreds.  So we've finally gotten smarter in investing more money into more durable toys.  That being said, the main thing I've learned is that one toy may work great for one dog and not for another.  So be sure to know what temperament and personality your dog is and unfortunately when it comes to store bought toys sometimes it's trial & error.  
These are the top five store bought toys that have been the best bang for our buck!

This has been the longest lasting toy of all time in our household.  And it's Rawley's favorite.  All you do is unscrew the two pieces apart, insert treats, screw it back together and give it to your pup.  I will make one note, we made the mistake of putting larger treats like milk bones inside, and Rawley quickly started to try to demolish the thing.  So be sure to put small kibbles inside that easily dispense.  Rawley will happily toss and roll this thing around the house trying to get treats to appear. 

Plush toys and Rawley just don't work.  He chews them up quicker than quick.  That being said the one plush toy that seems to last the longest (by longest I mean 30 minutes) is this one.  He gets so excited for this thing, that now when I bring one home he'll gently carry it around the house.  Then after about 30 minutes he can no longer resist to tear the thing apart.  If you have a dog that likes plush toys these are great.  Unfortunately, Rawley only rarely gets these guys. 

Hat's off  to this thing.  It's strong, it lasts.  Rawley's favorites are either peanut butter or american cheese placed inside.  While this doesn't keep him occupied for a long period of time, it's a great way for him to get rewarded and is a great afternoon snack.

4.  Wobbler
This was our most recent purchase.  And I have to admit I've been passing this thing up for a long time due to the price.  I just couldn't justify the cost, then a month ago Brian's cousin was gracious enough to house sit and watch Rawley.  Because she saved us money from having to board Rawley, I splurged on this item for Rawley and Ava (Brian's cousin's dog) to play with.  I'll admit, while pricey this thing is great.  It's weighted at the bottom and forces your pup to nudge the thing around for kibbles to be dispensed.  It took Rawley a bit to figure it out, but once he did he loves this thing!

This was the first toy we ever bought where we said, "Well that was worth the price".  It lasted and lasted and lasted.  I think for almost 18 months, which for Rawley is a lot!!  Again, kibbles are inserted in each end then dispensed by dropping it or rolling it around.  

Are you starting to see a habit with Rawley?  If the thing gives him a treat he'll stay occupied for hours at a time :)  These are just a few of the things we do to entertain our pup.  We've also come up with some DIY and homemade dog toys and treats that I'll share with you another time.

What games or toys do your pups love?


Advent Calendar by Wheel & Basket

You know I love sharing my finds ~ vintage or new ~ with all of you.  And this holiday season, I've found some amazing products and people I can't wait for you to meet!  
So today I'm super excited to introduce you guys to Wheel & Basket!  
This one is especially near and dear to my heart as it's owner and creator is my mom!  While her entire product line won't officially debut online until 2014, I talked her into letting me share with you guys her limited edition Advent Calendar Stockings.  (UPDATE:) After the amazing response we've had from all of you, she launched her Etsy shop early to make ordering easy!  The set includes numbers 1-25, each stocking is hand sewn, and colors alternate between black & grey with white numbers.  They're selling for $55 + shipping, but for Iron and Twine reader's she's offering free shipping to the Continental US.  To get your free shipping promo code and custom Etsy listing, email me at michelle@ironandtwine.com.  Again, there's only a limited number available for delivery by December 1st, so be sure to order yours now!
Not only is an advent calendar a great way to countdown to Christmas, but it adds festive decor to your home.  So whether you put treats, goodies or ornaments be sure to include one into your home this Holiday Season! 
So whether you want your own Advent Calendar Stocking Set or plan to give one as a gift, remember there's only a limited number available for delivery by December 1st.  Email michelle@ironandtwine.com for your free shipping promo & custom Etsy listing!

Wishing you all a happy day!

Holiday Planning Update

After my post last week about the top 10 things to do now for the holidays, I'm determined to be well organized for the upcoming holiday season.  So to give you guys an update on where I am in the process, I wanted to share with you the Holiday Color Palette I've decided on.  By going through things I already had and picking up some additional gift wrapping supplies, I've finalized on the following:
 
 An emphasis on Whites and Greens, with pops of Red Pear and an accent of Golden Khaki.  I plan to incorporate these colors throughout our house as well.  Adding additional prints like black and white buffalo check and other accents like mercury glass.  Again, the goal for my holiday decor is for a no fuss, simple, joyful design.  
What color palette are you planning on for the Holiday?
______________________________________________________

In other Holiday updates, if you're planning on Paper Whites for Christmas and the New Year it's just about time to plant them.  They typically need 4-6 weeks until flowering.  So to ensure I have their fragrant blooms for the holidays, I'll be planting mine this weekend. 
There you have it, a mid-week update on my Holiday Plan.  
Hope you all have a wonderful Wednesday!


Hot Chocolate Station

With the days beginning to get down right cold, it's that time of year where I like to have a big cup of something warm!  I love all the toppings that specialty coffee shops provide so I decided to bring that joy into our home.  And what better way to treat yourself than with a Hot Chocolate Station, and in the mornings a Coffee Bar.
I recently purchased a vintage Hoosier Cabinet Spice Rack and have been collecting coordinating glass spice jars to accommodate it.  The jars are the perfect size for individual toppings.  For our toppings bar I used Cinnamon Sticks, Sugar in the Raw, Milk Chocolate Sprinkles, creme de Pirouline Chocolate Hazelnut Wafers, White Chocolate Crisps, Peppermint and of course don't forget Marshmallows!  For the Hot Cocoa Mix I used this recipe from Alton Brown.  I decided to triple the recipe and store it in a large glass jar with instructions printed on the front.  The station makes it easy to make a a traditional cup of cocoa or one with whip cream, peppermint & chocolate sprinkles.
Don't have vintage spice jars?  No worries, small canning jars will do the trick.  
The key is to get toppings you love and keep it simple!
 The thing I love most about this is that I can leave everything out on my counter for continuous enjoyment.  So whether friends & family stop by at the last minute or Brian and I are wanting an after dinner treat, it's as easy as boiling water or brewing coffee then customizing your drink!
  I'm hoping to make this a season tradition here in our household.
What holiday treats are a custom for you and your family?
  

Mugs I Love

With cool weather upon us, you'll typically find me with mug in hand filled with something warm and yummy.  Whether you're looking for a special cup just for you or needing to update a set these are a few of my favorite found around the web.
1.2.3.4.5.6.7.8.9.10.11.12.13.14.15.

What warm drink will we find in your mug this time of year?

10 Things to do NOW, Before the Holidays

Happy November!
It seems like every year the Holiday Season starts earlier and earlier.  I mean what happened to Christmas decorations and music starting the day after Thanksgiving?  Here it is the day after Halloween and Christmas displays are in full force!  Truth be told, I started seeing them pop up as early as August this year.  Tis the Season?  More like Tis Half The Year!  Last year I was determined to do most of my shopping and decorating closer to Christmas itself.  That only resulted in frustration with items being sold out and caused a lot of unnecessary stress to get it all done at once.  If you can't beat 'em, join 'em.  So this year, I'm determined to have a simple, joyful, stress-free, successful Holiday Season.  Isn't that what it's all about anyways?!  I hope you'll join me this November (I'll still be posting Fall & Thanksgiving idea posts), but will also highlight Holiday Decorations and Christmas ideas to hopefully inspire you to have a joyful and stress-free holiday!  

So to kick off the season, here's the top ten things I'm doing now 
to ensure a happy holiday:
____________
10
Buy Holiday Postage Stamps
Last year I was shocked that they had SOLD OUT by the time I was ready to buy!
When I went to my local branch yesterday to ask when they will start getting them, they told me they've already sold out of in-store merchandise twice and are waiting on another shipment.  They suggested I come back next week and go online to pre-sell new designs, as the popular ones typically sell out.
____________
9
Buy White Lights
The other item that SOLD OUT last year that had me saying "Really?!" was white lights.  With more and more people decorating Christmas trees and the outside of their house with white string lights, it only makes since that they sell fast.  Last year I only needed 2 small boxes and I ended up wasting a whole day running around town trying to find some.  This was like two and half weeks before Christmas, not the day before, yet every store I went into practically laughed when I asked if they still had them.  I lucked out when I finally found a couple boxes hidden amounts the colored lighting.  But again, this took me an entire day of driving around town and fighting holiday traffic.  So this weekend I'm pulling out the white lights and assessing how many strands need to be replaced and I'm going out to buy them this weekend.
____________
8
Wrapping Paper
Whether you're looking for unique gift wrap or fun printed ribbon, now's the time.  Places like Michaels & Hobby Lobby will start putting that stuff on major sale and stores like Container Store always sell out of the best designs first.  So to ensure you get the best deal on the cutest stuff you may want to go ahead and stock up.
____________
7
Start a Shopping List
The season does have a way to get away from us, so make a list, keep it in your car or purse and add to it as needed.  That way when you're out and about running normal errands you can start knocking things off your never ending holiday list ~ think two birds one stone.
____________
6
Order/Buy Christmas Cards
We tend to forget that when ordering Holiday Cards it can take several weeks for them to be printed, shipped to us, plus the time it takes to personalize and mail them out.  For those of you that have already decided on your Christmas Cards ~ GO YOU!  For the rest of us, make it a top priority this week.
____________
5
Handmade Gifts
Every year I have plans to give handmade, personalized, thoughtful gifts.  It either ends up with me staying up all night trying to finish, or I brake down and buy something that costs way more than I originally wished to spend.  So, when making my Holiday to-do list this weekend, I plan to get a head start on those handmade items.  This also applies to any handmade or personalized gifts I plan to buy ~ think monogrammed gifts or Etsy purchases.  Wait too long and you'll be paying rush fees to have it arrive on time if at all.
____________
4
Holiday Decorations
If you're looking for unique or cheap Holiday decorations now's the time to hit up local thrift stores & consignment shops for vintage & second hand holiday decor.  Not only are prices marked to sell, but if you wait any longer, odds are it will be picked over.  I just bought some cute stuff I'll share with you next week!
____________
3
Buy Hot Ticket Items
Whether your kids want that trendy toy or your significant other wants the latest and greatest in the tech world, don't be left empty handed.
____________
2
Menu Plan
I always have plans of grandeur wanting to try some new holiday recipe.  Be it grandma's cookies or stuffing, now's the time to pick one new recipe you must make this holiday season.  Or maybe it's not a new one, but taking the time to perfect the one recipe that you never seem to get right the day of.
____________
1
Replace Batteries in Smoke Detectors
We all should be doing this twice a year anyways, but somehow this can easily be overlooked during the holidays.  So, heaven forbid you need to use them, give you and family peace of mind by getting this done now!
_____________________________________________________________

So let the holidays begin!  And I don't mean get all stressed out this weekend with this to-do list, but take some time to sit down, think about what's most important, make a list, check it twice and start crossing things off.  Let's plan ahead to ensure the holidays are what they're all about ~spending quality time with those closest to us!

Have a good Holiday to-do now idea?!
Share it with all of us in the comments below!

Vintage Find | Wooden Pestles & Mashers

I am all about starting new collections.  It gives you a purpose when thrifting and antiquing and allows vignettes around your house to have intentional pairings.  Right now I've got my eye on these vintage wooden mashers and primitive pestles.  I love that they come in all shapes and sizes, giving each one it's own character.
When looking for these I seek out ones with unique handles or intricate wood work.  $10 and under is my ideal price point and I try to find ones that have as few as cracks and damage as possible. (although one I have is quite beat up, but in only cost a buck)
For those that tend to be extremely dried out, I use the same process that I use for my wood bowls.  You can see that how to here.
But the best part about these old wooden pestles and mashers is not only are they decorative, but oh so functional as well!  I keep a few of my favorite in the kitchen to help with everything from muddling herbs to mashing potatoes.

 What collections are you currently starting?

Country Living Fair 2013 | Atlanta

Hello, hello!
I'm back from a super fun filled girl's weekend.  My mom and aunt made the trip to Atlanta ~ we shopped, we dined and we had a great time.  On Friday we made our way to the Country Living Fair and I wanted to give you guys a recap of that day.
Don't get me wrong, we had an awesome time, but somehow we ended up leaving a little disappointed.  In past years there have been a plethora of great antiques and vintage finds and this year we were left with something to be desired.  Most booths highlighted their homemade goods and the majority of older items had been up upcycled and re-purposed into different pieces.  Some vendors had come up with some pretty creative updates in the vintage department, however I tend to be more of a purist when it comes to vintage and antique finds. So while we didn't leave with a ton of stuff, we did find some amazing pieces along with some pretty awesome vendors.  Here's a few of my favorite from the Country Living Fair:
  An Ohio vendor, Jill Yegerlehner, shared her line of vintage items and reinvented pieces.   We loved her cute chalkboards and quirky finds!
Natalie Silver from Ingredients For Your Home styled a super cute setup!  We loved her vintage school house clock and vintage table setting.
Velvet Walker, owner of Velvet's Vintage, brought down a large assortment of vintage finds.  From watering cans to peach baskets, my personal favorite happened to be the berry crate I purchased from her.
  
 A favorite vendor of ours year after year as been The Little Art Studio.  There's always something in her booth we just can't leave without.  I found some cool vintage maps from New York that I'll share with you later. 
 
Of all the crafts and handmade merchandise, Jamie Jimenez of Julia's Poppies Design, was by far our favorite!!  She has created a beautiful collection of illustrated and calligraphed prints, posters and goods which you can see more of at Yours is the Earth.  Her market totes are adorable and 
be sure to check out her shop for more amazing gift options!
  From lamps to pewter, there really is something for everyone at the Country Living Fair.
 The best find of the trip was the cute sign my Aunt picked up from The Little Art Studio.  And while I left almost empty handed it turned out to be a fun day hanging with the girls!  
  Did you go to CLFair? or hit up any fun shops this weekend?  
Comment below with your finds.
And be sure to connect with me on Facebook & Instagram 
to stay up to date on all things Iron & Twine!

Meet Rawley | Our 3 Year Old Pup

A funny thing happens when you adopt a dog.
I use to find dog lovers a peculiar bunch ~ you know the ones.  The people who can't carry on a conversation without talking about their pup, eventually whipping out photos so you can see their beloved pooch?  Well after 3 years of loving this pup of our own, Brian and I have experienced this crazy joy and understanding of what it truly means to share a life with Man's Best Friend.  We now proudly call ourselves crazy dog people.
________________________________________

Rewind to January 2011.
Brian and I had been discussing getting a dog for quite sometime, but we kept giving ourselves the typical excuses.  They're a lot of work, they cost a lot of money, it'll tear up the house, blah blah blah.
Then we had this crazy ice storm in Atlanta, it pretty much shut down the city for a couple days, which led us browsing the Atlanta Humane Society website.  And that's when we saw Sgt. Floyd.  This adorable 3 month old pup, his cute little face, black and white with spots ~ how could you not fall in love?  With the city shut down the Humane Society was closed, so for the course of the storm we kept pulling up his puppy profile.  
We ooed and awed and kept telling ourselves now was not the time for a dog.  
When the storm passed, I went back to work on a Saturday.  Brian called to see if I had time for a quick lunch break ~ I was pretty busy so he said he'd drop off my lunch.  When I met him at the car, this is what greeted me:
An adorable Springador aka Labradinger Mix  
This was a welcome surprise, even though the initial response was what have done?!
I couldn't wait to get home that evening to see more of this cute adorable little face.
The funniest thing was in only a matter hours, Brian had trained him to sit.  
We pretty much thought we had adopted a genius dog!
The next big step was potty training.  I don't know if we did everything right, or if the stars aligned, but he was completely potty trained within a week.  
Again, we adopted a genius dog!

When it came to naming our pup, we had a few options, but none that we both loved.  It ended up being my 7 year old brother who came up with Rawley.  Truth be told, he actually said Rocky, but over the phone I misunderstood it for Raleigh ~ true story.  But for the history of it all, my brother gets all the credit.  We felt the spelling for Raleigh was a bit feminine, so we decided on the formal name Rawlings (like the baseball) and affectionately call him Rawley!

Those first couple weeks and months were fun.  When I look back I always wonder why I don't have more photos of him when he was cute and little.  Then I remember that as a young puppy he was always on the move and trying to capture a somewhat-not-blurry picture of him was nearly impossible.
As he started to grow, so did our love for him.  We were quickly aware that he listens and plays with Brian and is sweet and snugly with me.
In that first year he typically looked like this:
No matter how many baths he got, he was always dirty and covered in Georgia clay.
For the most part he was a really well behaved puppy.  He typically only chewed on his toys and rarely made a huge mess in the house.  But there was this one day...
I was cleaning the house for company and had cleared out Rawley's crate.  I had put his bed outside for all of 10 minutes when this happened:
Then 30 minutes later he decided to do an encore and dig up my hydrangeas:
But really how can you stay mad at a face like that?!
Of all his puppy years, this was the only day he was super naughty.
________________________________________

That first year we learned a lot about patience and loved the joy he brought into our home.  So to celebrate his first birthday we thew him a Puppy Pizza Birthday Party.  I believe this was the turning point where I turned into a crazy dog loving person.

Over the next year he grew into a boy dog (you know, vs a puppy dog)  
Still loving to play outside and always loving to be part of the action. 
 When Brian was at work he would humor me, allowing me to take his photos.  
And although he wishes I never showed this pic, 
he even let me dress him up for our Valentine's Day card:
 Bones and treats are his favorite: 
 And to this day our life wouldn't be the same without him.  He's taught us responsibility, the meaning of unconditional love, and has showed us to appreciate the little joys in life ~ like a car ride on a crisp fall day!
No matter what kind of day we're having, it's always the best to come home with Rawley greeting us at the front door.

Are you a crazy dog person?!
________________________________

For those of you looking to expand your family, we strongly urge you consider adopting.  With so many amazing rescue groups and shelters it's easy to find a perfect match for your family.  Rawley changed our life and we hope you will consider changing yours!
For more information on adoption check out the Humane Society Website.

Country Living Fair | Atlanta

Guess what time it is?!
The Country Living Fair Atlanta is just a couple days away and I'm getting excited!
My mom and I have made it a Girl's Weekend tradition the past couple years and we no doubt will be attending again this year.
It's pretty much like Christmas for those who love all things vintage and handmade!
What?  You've never been?!
Well, take a seat, I've got your go-to guide to make it a fun & successful weekend!

First things first ~ tickets.
You can buy them here, which I strongly suggest you do prior to the weekend.  They do have ticket sales day of, but of course they cost more and
 you'll have to wait in line to purchase them.

Early Bird Weekend Pass vs Regular Weekend Pass
 If you love one of a kind vintage items, the Early Bird is the way to go!  Think with any yard or estate sale, the good things go first.  With the Early Bird you're given early admission ~ an hour and a half before the event opens to the public.  And the best part is some vendors give discounts during this time and you're not having to fight the crowds!  But, of course the cost is significantly more.  So, if you're not planning to buy a lot of vintage and antique items, and you don't mind the crowds, you may want to go with the regular ticket.
_______________________________________________________

What to Bring
  A large tote 
You'll want to have a bag large enough to carry your small purchases.  A lot of the people also bring those rolling carts to carry their goods.  For larger items there are porters on hand to haul off your finds and bring them to your car.

Bring plenty of cash
Only a limited number of vendors accept credit cards so be sure to have cash on hand.
(there is an ATM on property should you run out)
_______________________________________________________

What to Wear
Comfortable Shoes
Stone Mountain is a straight up woodsy park!  While the event does have sidewalks, most vendors are set up throughout the trees, so watch out for roots and stumps.  Also, there are a lot of booths and vendors, so plan to do a lot of walking.

Casual
For the most part everyone is dressed super casual.  I have noticed a lot of women will accessorize with colorful scarves or fun jewelry.  So dress comfortably, but don't be afraid to show your personality.

Layers
Be sure to check the weather forecast, but this year it looks like it will be a chilly start with the lows in the 30s!  So be sure to bring a coat and mittens, especially those of you attending in the morning!  
_______________________________________________________

Food
There are plenty of food trucks serving up lunch or a needed snack.
There's also typically a vendor that serves coffee ~ but be aware that in the mornings this line is long ~ so you may want to bring your first cup.
_______________________________________________________

What to Buy
Be sure to check out the vendor list prior to going to see who is selling any given year.

Vintage and Antique Finds
You'll find an array of vintage and antique items.  Think schoolhouse chalkboards, wooden dough bowls,  furniture, ironstone and more

Handmade Items
There are a lot of vendors who sell their crafts.  From hand sewn totes, clothes and baby bibs to handmade jewelry and art, there's a craft vendor for all tastes.

Holiday Decor
Needing Christmas Ornaments or a festive table runner?  
This is the perfect place to stock up on decor.

My Past Purchases
In the past two years, I've bought a random assortment of small goods ~ from vintage flashcards to silver flatware.  Last year I purchased this Main Street Sign:
Then two years ago, after my Mom bought these theater chairs:
I went and copied her and bought these from Cari Cucksey:
Needless to say, the Country Living Fair has something for everyone!

Will you be attending the Country Living Fair Atlanta this year?!