

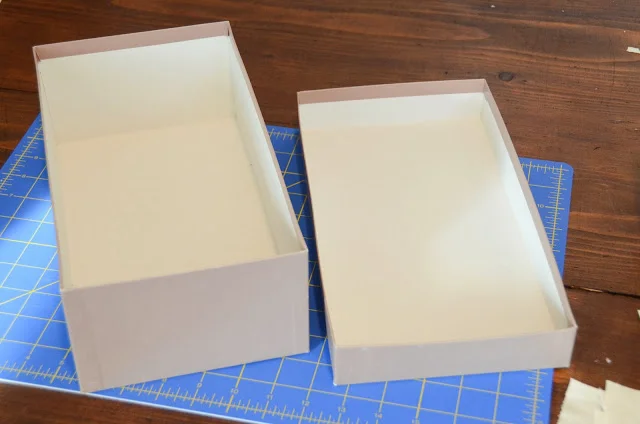
Fabric Covered Shoe Boxes
I'm a huge fan of hidden storage and when done correctly, it can be the perfect example of both form and function. But boy, oh boy, can organizational boxes add up quickly when buying them retail. So to save some dough, I decided to make my own ~ and I'm now wondering why I haven't done this all along. Don't be fooled by all the photos below, this project is easier than it looks! Once I got the first one done, the others were a breeze. For this project I used shoe boxes, but you could do the same with any square/rectangular box with a lid.
What You'll Need:
Shoe Boxes
Rotary Cutter and Mat OR Scissors
Glue
*You could use Fabric Glue, it typically dries clearer, but the stuff is pricey and I found
did the trick, just be sure not to get the stuff on the outside of the box, because it is visible through the fabric*
Fabric
My tips on Fabric
Take a box to the fabric store with you! If you're lucky and all your boxes are white with no writing, then no need to worry about this. But most shoe boxes are colored or have labels, so when purchasing fabric you don't want it to be too thin and see through. Of course you could always double it up, but that's double the work. Also, you don't want the fabric to be too thick, because if it's too bulky, odds are your lid will no longer fit onto the box. I ended up using a utility fabric from Jo-Ann's Fabric that was $5.99 a yard ~ but I used a 40% off coupon, making it $3.60 a yard. Depending on the size of my box (how much fabric used) and the size of the book plate used ~ the total price for my Fabric Covered Shoe Boxes were $2 - $3.25 each. Not bad compared to similar ones for $12-$20 a piece!
___________________________________________________
To Make:
Start with your shoe box:
For $29.99 I invested in this
. Not necessary for this project, but if you plan to do a lot of these, it cuts the cutting time down significantly rather than using regular scissors. Either way, cut your fabric to size, giving approximately, a quarter to half an inch extra on each side (this is the section that will be glued to the inside of the box).

Once your fabric is cut to size, iron the fabric.

This step is crucial to ensure a smooth finished surface.
Once your piece is ironed, it's time to start:
Lay the fabric on a smooth surface, then place your shoe box lid directly center. To ensure the lid stays in place and doesn't slide around, use a clothespin to secure the fabric to the opposite side you begin working on.

On the right corner, cut out a square/rectangle. This step solely removes excess bulk that would otherwise be glued onto the box. Should you leave it, more than likely the lid will no longer fit onto your box due to excess thickness. If you look closely, you don't want to cut directly up to the corner of the box, but rather leave approx a quarter of an inch. Look ahead a couple steps to see how this forms a seamless edge for your box.

Once the right side is complete, do the same for the left::

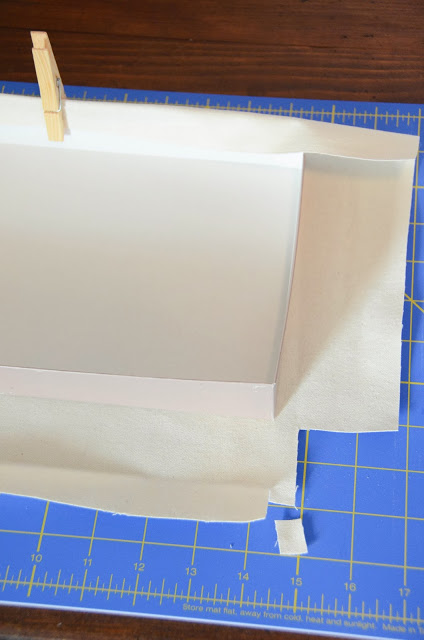
Now this next part sounds trickier than it is. Bring the fabric up and crease the fabric where it goes over the lip of the box, see where the crease is below:

Then you want to cut that quarter of an inch that you originally left as extra. Be sure to only cut it down to the crease and not all the way to the box (see photo above).
Once you've cut you're little piece, take about 1/2 of it off (photo below) ~ again, this is to eliminate excess bulk.
Do the same for the other side, then grab your glue.
Add glue only to the part of the fabric that is going inside the box (squiggle line below), and add a thick line to the right and left side (this is the fabric that will make up the corners.
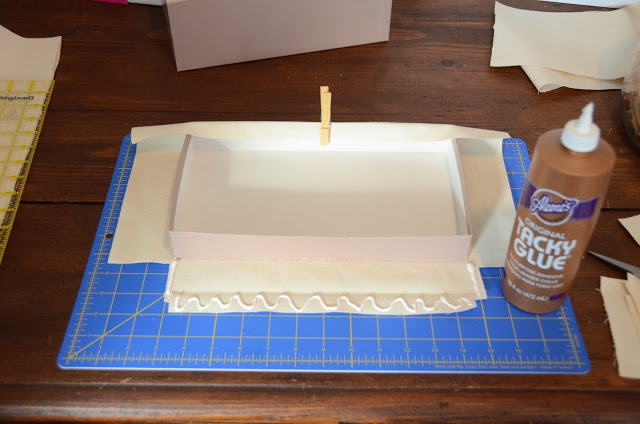
Press the fabric firmly to the inside of the box from the center outwards, this will smooth out any bumps.
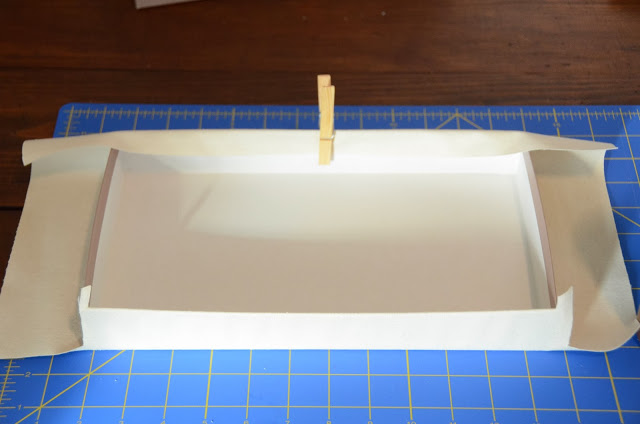
Then place clothespins on the sides and center to hold the fabric as you start the opposite side.

Do all the steps above for the opposite side of the box and once again, place clothespins:
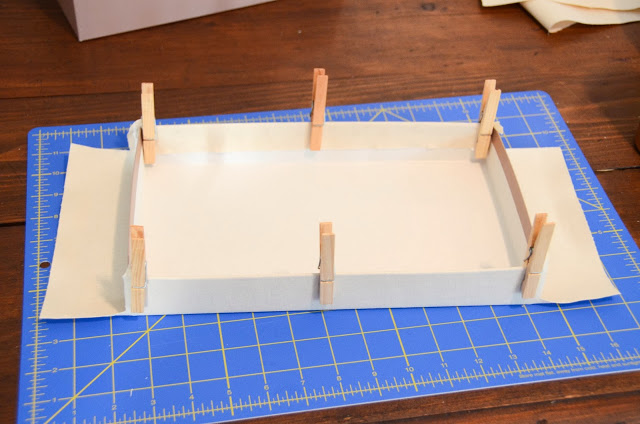
Now for the remaining sides. Hopefully, you worked quickly enough and the glue you placed is still not entirely dry, if it is feel free to put more glue to each corner (you can see the original glue dripping slightly on each corner below:)

Again, this step looks trickier than it is. The best frame of reference for you is to think of wrapping a gift.

Press the right corner in and fold in the excess fabric, like in the photo above.

Bring fabric up and over trying to ensure you have a nice straight line on the corner.

Do the same for the left corner, then add additional glue to the edge of the fabric and glue in place.
Again, add clothespins to hold, then do the same for your last side. Once all four edges are complete, do the exact.same.thing for your box body. Once the top and bottom are finished allow them to dry completely.

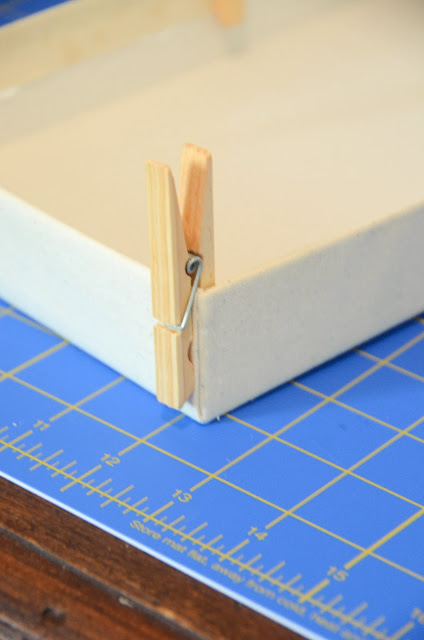
Once dry take off the clothespins. The inside corner should look something like this:

If you feel the inside needs more glue add a thin layer, otherwise, you're good to go!

To give this box a finished look, I added these
. They're perfect for inserting labels and they stick nicely, although if you want them to be permanent I do suggest applying them with additional glue.

_____________________________________________
There you have it, an easy DIY that looks good and is easy on the pocket book!

These are great for storing personal keepsakes like photos:

Or for organizing craft, art or office supplies:

And also work great for your closet, organizing scarves or accessories:
